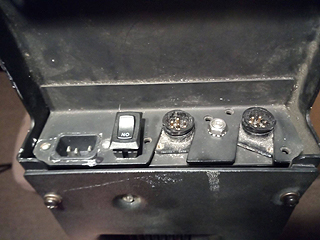
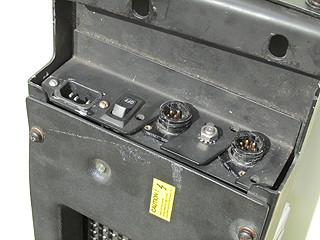
| The next step on the conversion project is cutting and shaping the hole for the on/off switch. The switch isn't physically set yet in case I have to access its terminals. |
| YOUR SOURCE FOR PREVIOUSLY ENJOYED ELECTRONIC SIGNS & AFTER MARKET PARTS. (Click on a tab below to switch store departments. The GREEN tab is the department you're in now.) |
COLOURED NUMBER CODES:
FF0000 = 0 RED (Bright Red)
FFCC00 = 1 ORANGE (Pumpkin Spice)
FFFF99 = 2 YELLOW (Pale Yellow)
99FF99 = 3+ GREEN (Misty Green)
FF0000 = 0 RED (Bright Red)
FFCC00 = 1 ORANGE (Pumpkin Spice)
FFFF99 = 2 YELLOW (Pale Yellow)
99FF99 = 3+ GREEN (Misty Green)
Destination Sign Conversion to Operate on 110 Volt (House) Power
For an additional charge, ANY of the signs offered for sale can be converted to run directly
on 110 volt house power. Simply plug in and go! No external power supplies needed!
Click or tap the links below to see previous conversion projects from start to finish. Green text is the example shown.
For an additional charge, ANY of the signs offered for sale can be converted to run directly
on 110 volt house power. Simply plug in and go! No external power supplies needed!
Click or tap the links below to see previous conversion projects from start to finish. Green text is the example shown.
Luminator Horizon Side LED
Find something you like? Have any questions? E-mail me at:
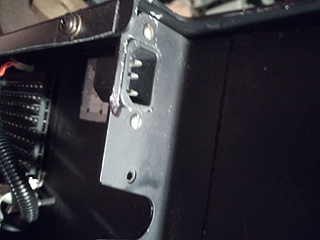
First step is cutting and shaping a hole for the wall power plug in
on the sign. Common electronic device plugs like what you would
see on the back of a computer are utilized for ease of use. The
back contact from this plug are safely contained inside the sign.
on the sign. Common electronic device plugs like what you would
see on the back of a computer are utilized for ease of use. The
back contact from this plug are safely contained inside the sign.
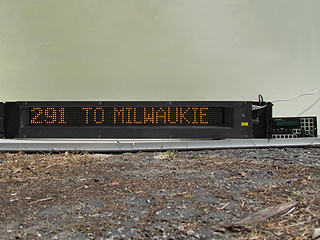
| Completed Project! Plugs right into the wall! The only other cable is to connect the keypad to the sign. This became the dream birthday gift for (at the time) a very excited 17 year old transit fan! It was constructed with internal wiring and safeguards so that even young owners can use these safely. |
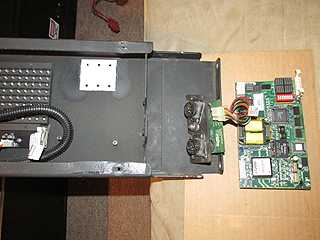
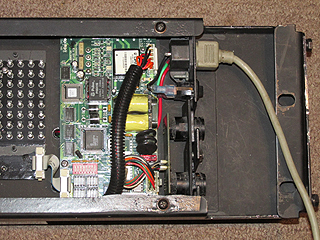
| Starting a new project! One of TWO Luminator electronic signs I'm rebuilding and modifying to be plugged right in to the wall. The first step for this Horizon side sign is removing its motherboard and power/data connectors so that the physical body can be modified. |
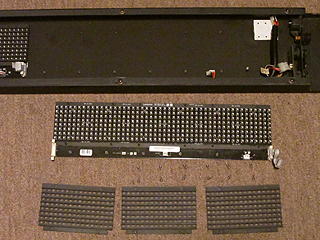
Next step in the
conversion
involves removing
one of the LED
panels to set the
mounts for the
power supply.
conversion
involves removing
one of the LED
panels to set the
mounts for the
power supply.
| Want one of your own? Click or tap this link to email for more info. → |
| All the wire conduits are drilled, the power plug and switch are now set into the body, and the power and grounding wires are connected. All that's left is running the internal power and data wires to the circuit boards inside to get the required internal power... and if it works will be done! |

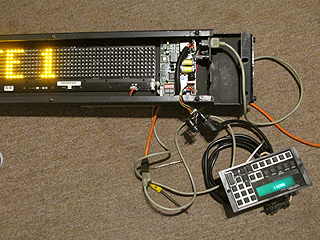
The internal power and data lines were cut, soldered in and loosely
connected to everything. I hooked up the keypad to the sign, turned the
power on my the switch I installed (no external power supply in use) and
SUCCESS! It lights up and transfers data correctly! All that's needed
now is to put it all back together correctly and get the front cover on and
it's all set! The final step after these physical changes are done is to
complete and transfer the program onto the system for the customer!


| (Including LUMINATOR LIDS and TRANSIGN/GULTON Hybrid signs) |


| (Including Pocatec Ltee. signs) |

| EXTRA SERVICES OFFERED |
| EXTRA SERVICES OFFERED |